如何设计android的登录界面
发布时间:2025-05-13 13:48:14 发布人:远客网络
一、如何设计android的登录界面
在网上在到一个登录界面感觉挺不错的,给大家分享一下~先看效果图:
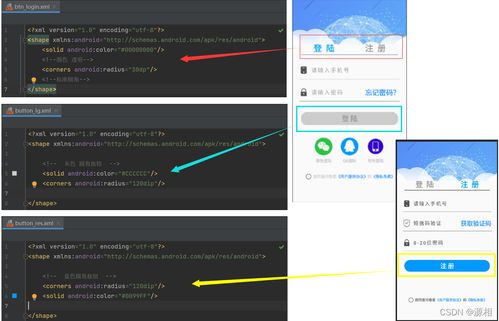
这个Demo除了按钮、小猫和Logo是图片素材之外,其余的UI都是通过代码实现的。
背景蓝色渐变,是通过一个xml文件来设置的。代码如下:
<?xml version="1.0" encoding="utf-8"?>
android:startColor="#FFACDAE5"
startColor是渐变开始的颜色值,endColor是渐变结束的颜色值,angle是渐变的角度。其中#FFACDAE5中,FF是Alpha值,AC是RGB的R值,DA是RGB的G值,E5是RGB的B值,每个值在00~FF取值,即透明度、红、绿、蓝有0~255的分值,像要设置具体的颜色,可以在PS上的取色器上查看设置。
效果图上面的并不是白框,其实框是白色的,只是设置了透明值,也是靠一个xml文件实现的。
<?xml version="1.0" encoding="UTF-8"?>
<solid android:color="#55FFFFFF"/>
注意: bottomRightRadius是左下角而不是右下角 bottomLeftRadius右下角-->
<corners android:topLeftRadius="10dp" android:topRightRadius="10dp"
android:bottomRightRadius="10dp" android:bottomLeftRadius="10dp"/>
界面的布局挺简单的,就直接贴代码啦~
<?xml version="1.0" encoding="utf-8"?>
android:orientation="vertical"
android:layout_width="fill_parent"
android:layout_height="fill_parent"
android:background="@drawable/background_login">
<!-- padding内边距 layout_margin外边距
android:layout_alignParentTop布局的位置是否处于顶部-->
android:layout_width="fill_parent"
android:layout_height="wrap_content"
android:layout_margin="15dip"
android:background="@drawable/background_login_div_bg">
android:layout_width="wrap_content"
android:layout_height="wrap_content"
android:layout_alignParentTop="true"
android:layout_marginTop="5dp"
android:text="@string/login_label_username"
android:layout_width="fill_parent"
android:layout_height="wrap_content"
android:hint="@string/login_username_hint"
android:layout_below="@id/login_user_input"
android:inputType="text"/>
android:layout_width="wrap_content"
android:layout_height="wrap_content"
android:layout_below="@id/username_edit"
android:layout_marginTop="3dp"
android:text="@string/login_label_password"
android:layout_width="fill_parent"
android:layout_height="wrap_content"
android:layout_below="@id/login_password_input"
android:inputType="textPassword"/>
android:layout_width="wrap_content"
android:layout_height="wrap_content"
android:layout_below="@id/password_edit"
android:layout_alignRight="@id/password_edit"
android:text="@string/login_label_signin"
android:background="@drawable/blue_button"/>
android:layout_width="fill_parent"
android:layout_height="wrap_content">
android:text="@string/login_register_link"
android:layout_width="wrap_content"
android:layout_height="wrap_content"
android:layout_marginLeft="15dp"
android:textColorLink="#FF0066CC"/>
android:layout_width="wrap_content"
android:layout_height="wrap_content"
android:layout_alignParentRight="true"
android:layout_alignParentBottom="true"
android:layout_marginRight="25dp"
android:layout_marginLeft="10dp"
android:layout_marginBottom="25dp"/>
<ImageView android:src="@drawable/logo"
android:layout_width="wrap_content"
android:layout_height="wrap_content"
android:layout_toLeftOf="@id/miniTwitter_logo"
android:layout_alignBottom="@id/miniTwitter_logo"
android:paddingBottom="8dp"/>
二、如何使用Android Studio开发用户登录界面
1.前提是已经将基本的运行环境及sdk都已经安装好了,本文不再赘述。右键点击new-->Module,Module相当于新建了一个项目。如图所示
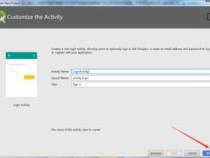
2.选择Android Application,点击next
3.将My Module和app改成自己项目相应的名字,同时选择支持的Android版本
4.这一步选择Blank Activity,自己手动编写登录界面,而不依赖系统内置的Login Activity,一直点击next,最后点击finish就完成了项目的创建
5.在project下可以看到出现了刚才创建的login项目
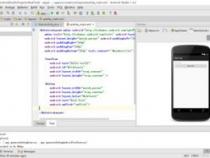
6.展开res/layout,点击打开activity_main.xml文件,在这个文件里将完成登录界面的编写
7.这是初始的主界面,还没有经过编写的界面,Android Studio有一个很强大的预览功能,相当给力
8.将activity_main.xml的代码替换成如下代码:
<TableLayoutxmlns:android=""
android:layout_width="fill_parent"
android:layout_height="fill_parent"
android:gravity="center_vertical"
android:stretchColumns="0,3">
android:layout_width="wrap_content"
三、如何使用AndroidStudio开发用户登录界面
使用 Android Studio创建用户登录界面的步骤如下:
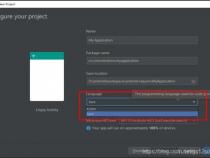
1.打开 Android Studio,点击菜单栏中的“File”选项,然后选择“New”->“New Project”来创建一个新的项目。
2.在创建项目界面中,输入您的项目名称,然后点击“Next”按钮继续。
3.在下一步中,选择“Empty Activity”作为您的项目模板,然后点击“Next”。
4.选择您的项目保存位置,并点击“Finish”完成项目创建。
5.创建完成后,您会看到默认的activity_main.xml布局文件,这里还没有用户登录界面的元素。
6.要添加登录界面,您需要编辑activity_main.xml文件,并添加必要的布局元素,如输入框(EditText)和按钮(Button)。
7.接下来,您需要创建相应的Activity类,用于处理用户输入和登录逻辑。
8.在您的项目中,创建一个新的Java类,命名为“LoginActivity.java”,并在其中编写登录逻辑。
9.在 LoginActivity.java类中,使用 findViewById()方法获取界面上的元素,并为按钮添加点击事件监听器。
10.在按钮的点击事件中,编写逻辑来处理用户登录,例如检查用户名和密码是否正确。
11.最后,您需要配置应用的Manifest文件,以确保您的登录Activity可以正常运行。
完成以上步骤后,您就成功创建了一个简单的用户登录界面,并编写了基本的登录逻辑。